Configure Instances
To begin, we will create and configure three instances that will serve web traffic. Please see the Alamo User Guide for additional information on how to create and configure instances.
First, create a security group that allows SSH and HTTP traffic. Second, create three instances from the CentOS-7 image. We’ll call these instances server-1, server-2, and server-3. Third, assign a public floating IP address to server-1. Your configuration should now resemble:
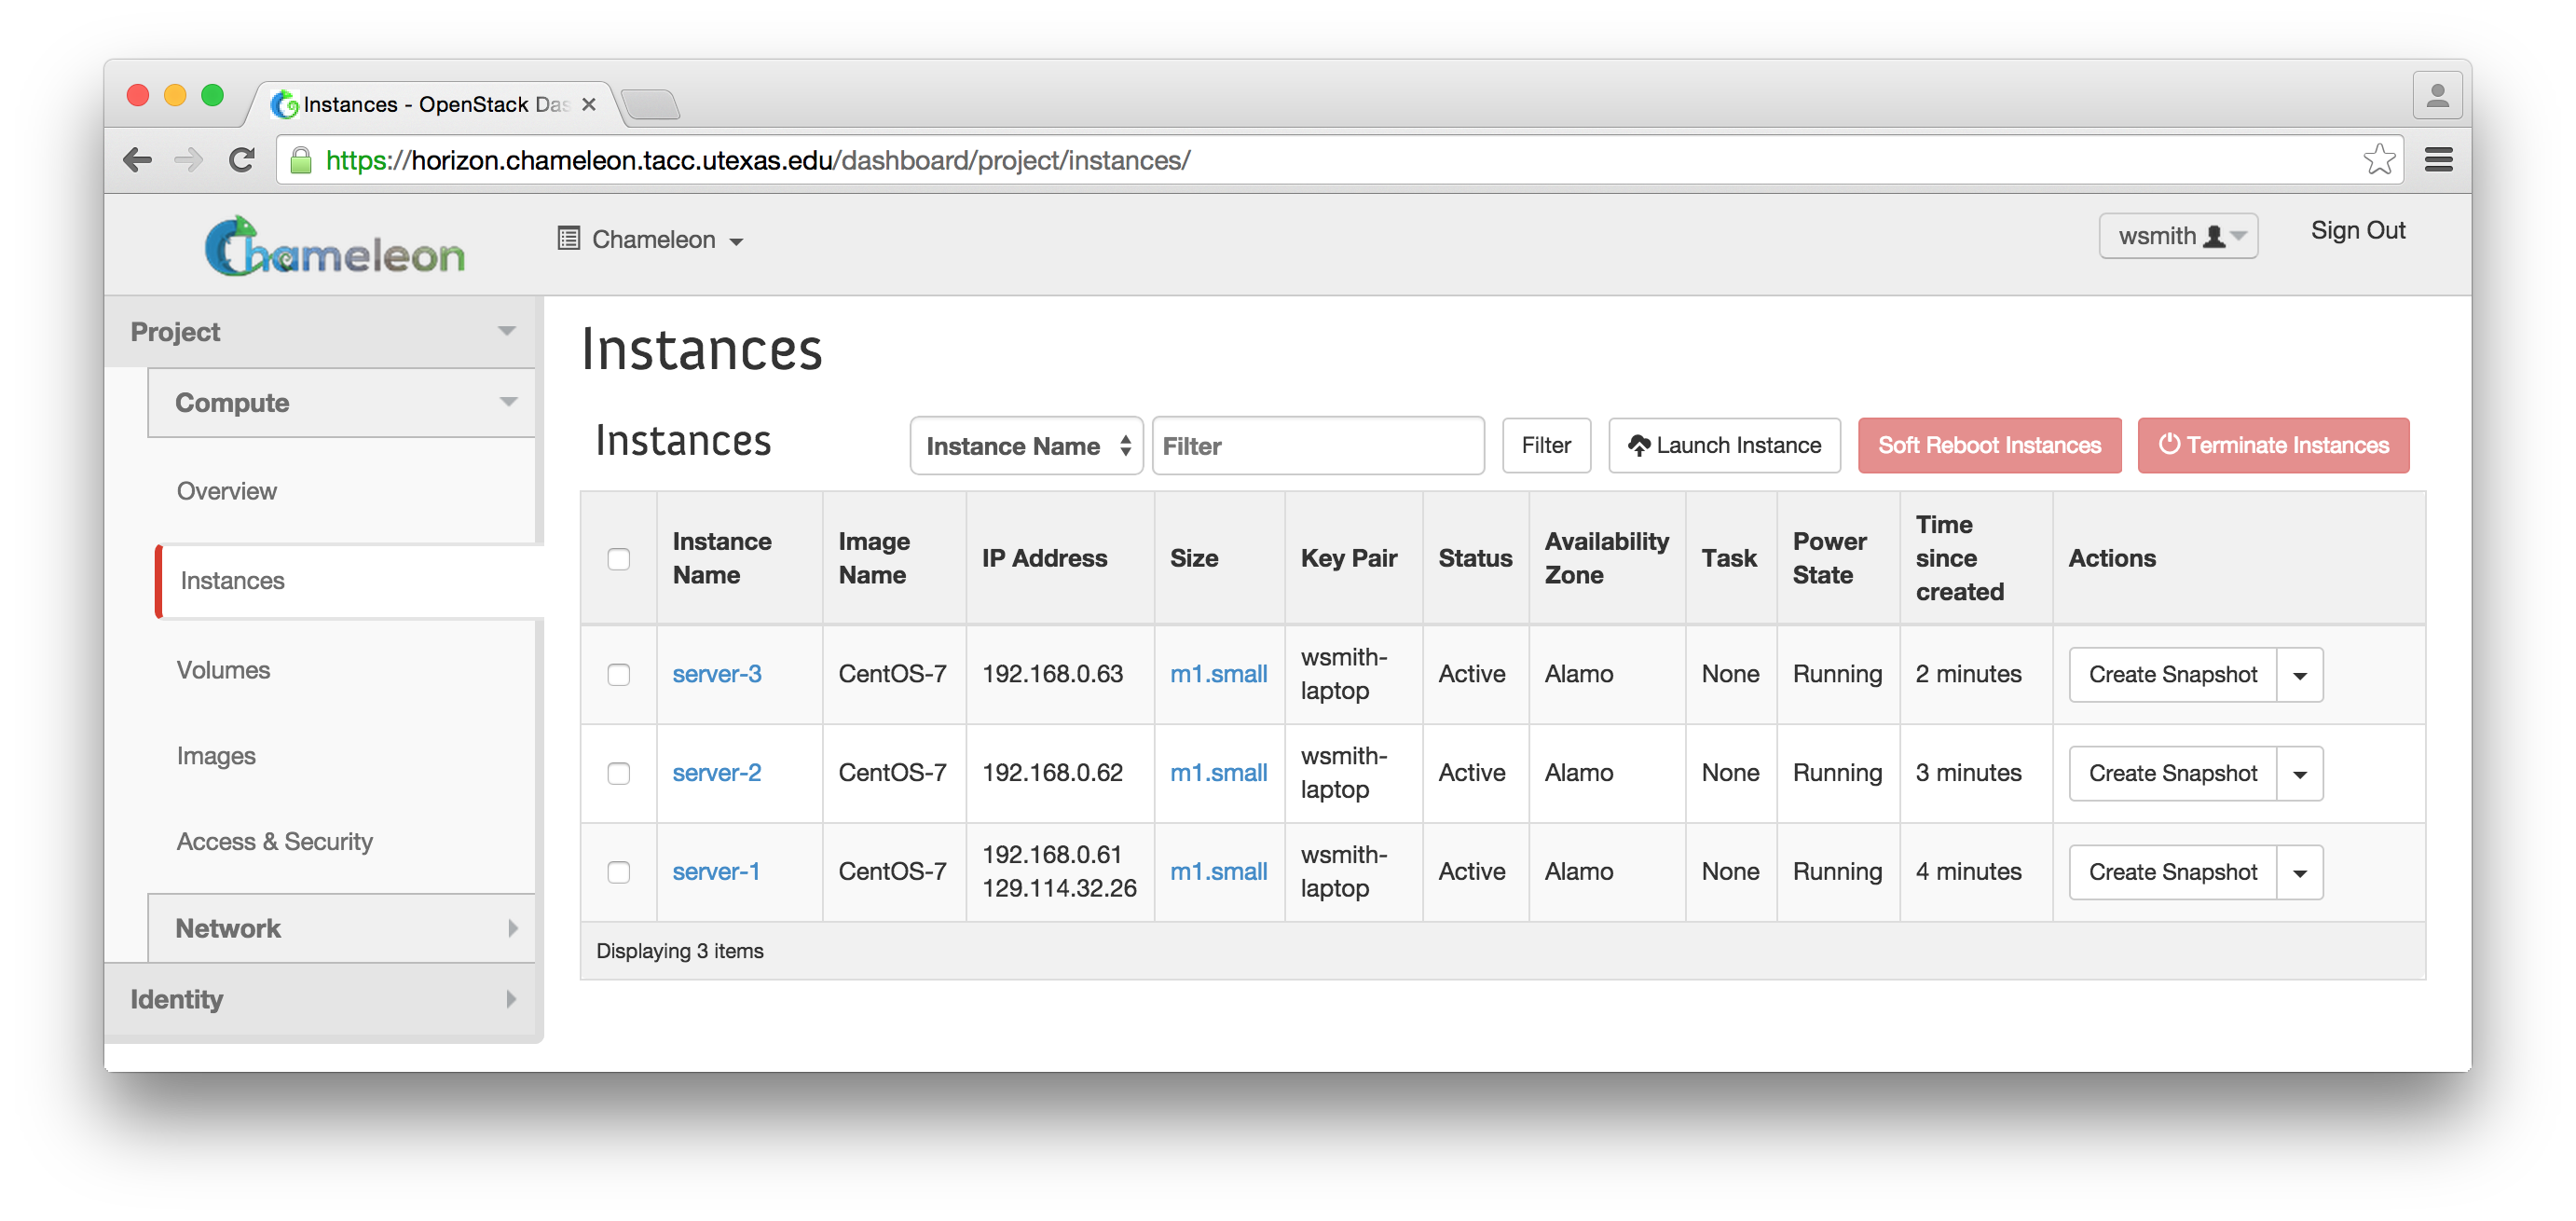
Next, ssh to server-1 and configure it by (replace all IP addresses below with the ones allocated to your instances):
$ ssh -A cc@129.114.32.26 [cc@server-1 ~]$ sudo yum install httpd [cc@server-1 ~]$ sudo systemctl enable httpd.service [cc@server-1 ~]$ sudo systemctl start httpd.service [cc@server-1 ~]$ sudo sh -c "echo server 1 > /var/www/html/index.html"
If you visit http://129.114.32.26 in your web browser, you will see ‘server 1’
From server-1, ssh to the private IP addresses of server-2 and server-3 and configure them similarly:
[cc@server-1 ~]$ ssh 192.168.0.62 [cc@server-2 ~]$ sudo yum install httpd [cc@server-2 ~]$ sudo systemctl enable httpd.service [cc@server-2 ~]$ sudo systemctl start httpd.service [cc@server-2 ~]$ sudo sh -c "echo server 2 > /var/www/html/index.html" [cc@server-2 ~]$ exit [cc@server-1 ~]$ ssh 192.168.0.63 [cc@server-3 ~]$ sudo yum install httpd [cc@server-3 ~]$ sudo systemctl enable httpd.service [cc@server-3 ~]$ sudo systemctl start httpd.service [cc@server-3 ~]$ sudo sh -c "echo server 3 > /var/www/html/index.html" [cc@server-3 ~]$ exit
Your three instances are now ready to start serving trivial http requests. For the rest of this guide, you do not need a public IP address for server-1, so you can disassociate it from server-1.
Configure Load Balancer
Now that we have instances, we can configure a load balancer to route traffic to them. This is primarily accomplished via the Load Balancer page that you can navigate to under Project -> Network in the left menu.
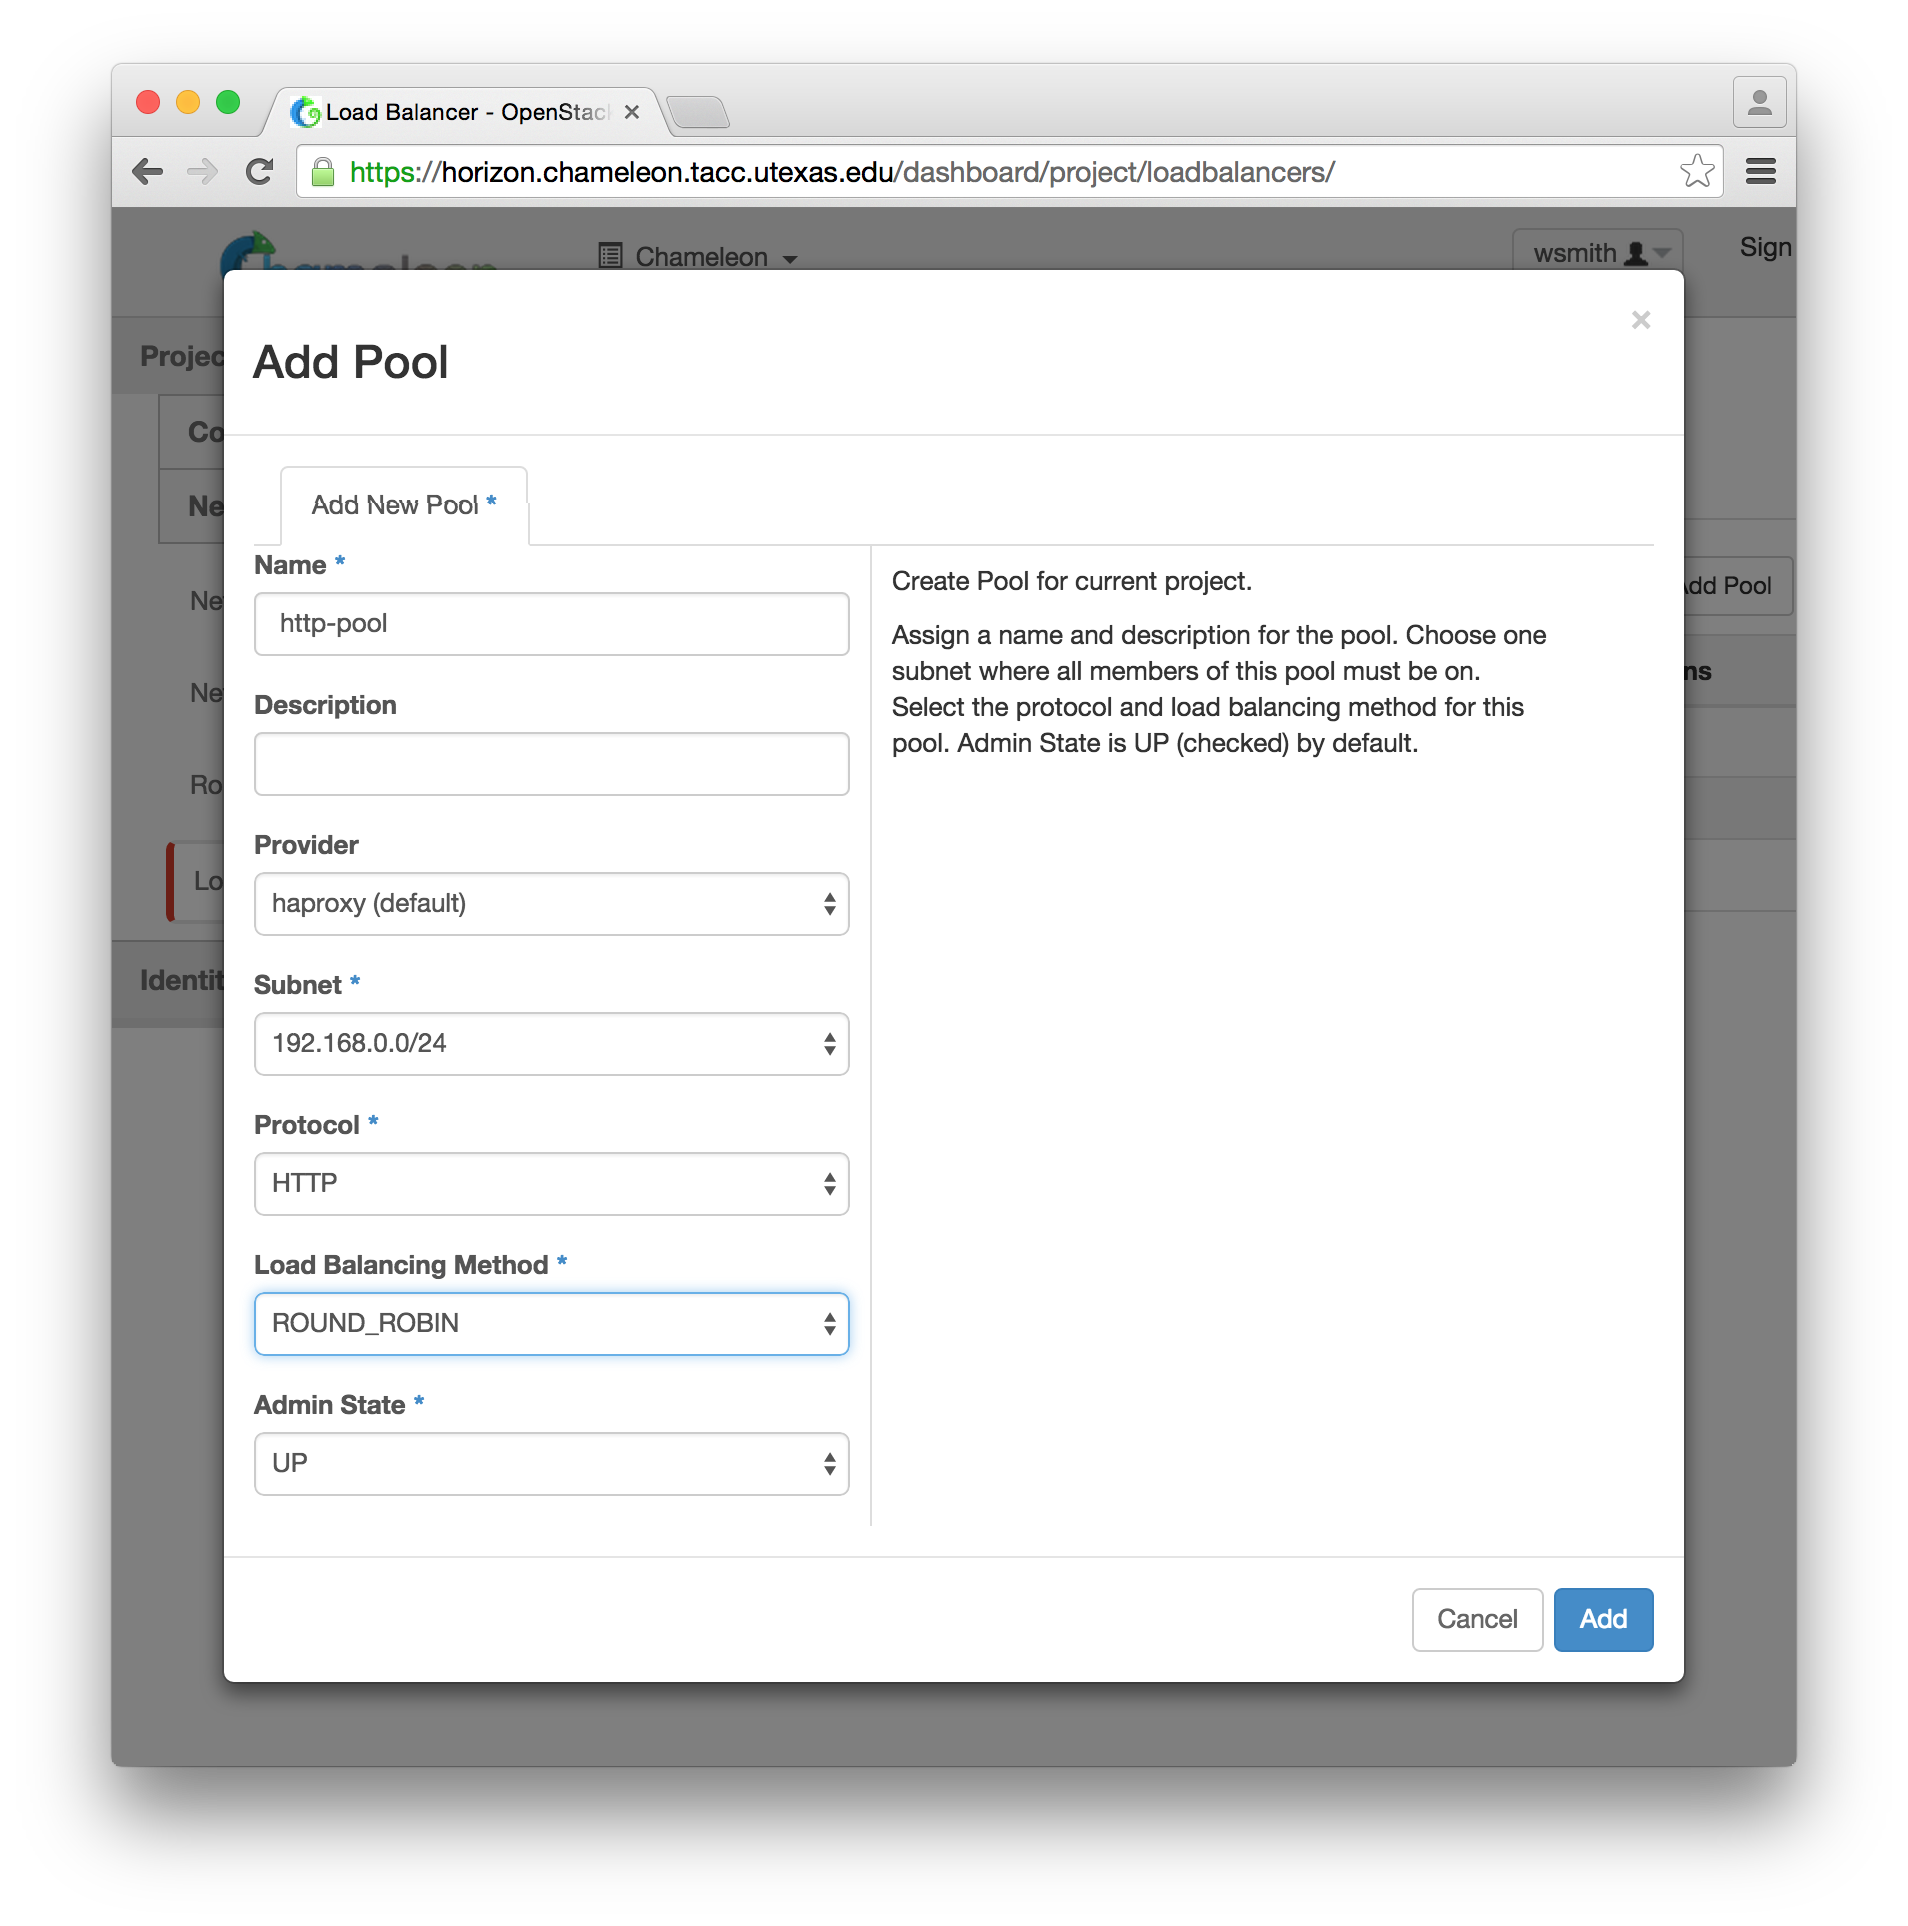
First, in the “Pools” tab, select the “Add Pool” button on the right side of the page. Pick a name and enter an optional description. The only provider that is currently available is haproxy. Select the private subnet for your project, not the subnet that is used for public IP addresses (129.114.32.0/23). For this example, select the HTTP protocol and the ROUND_ROBIN load balancing method:
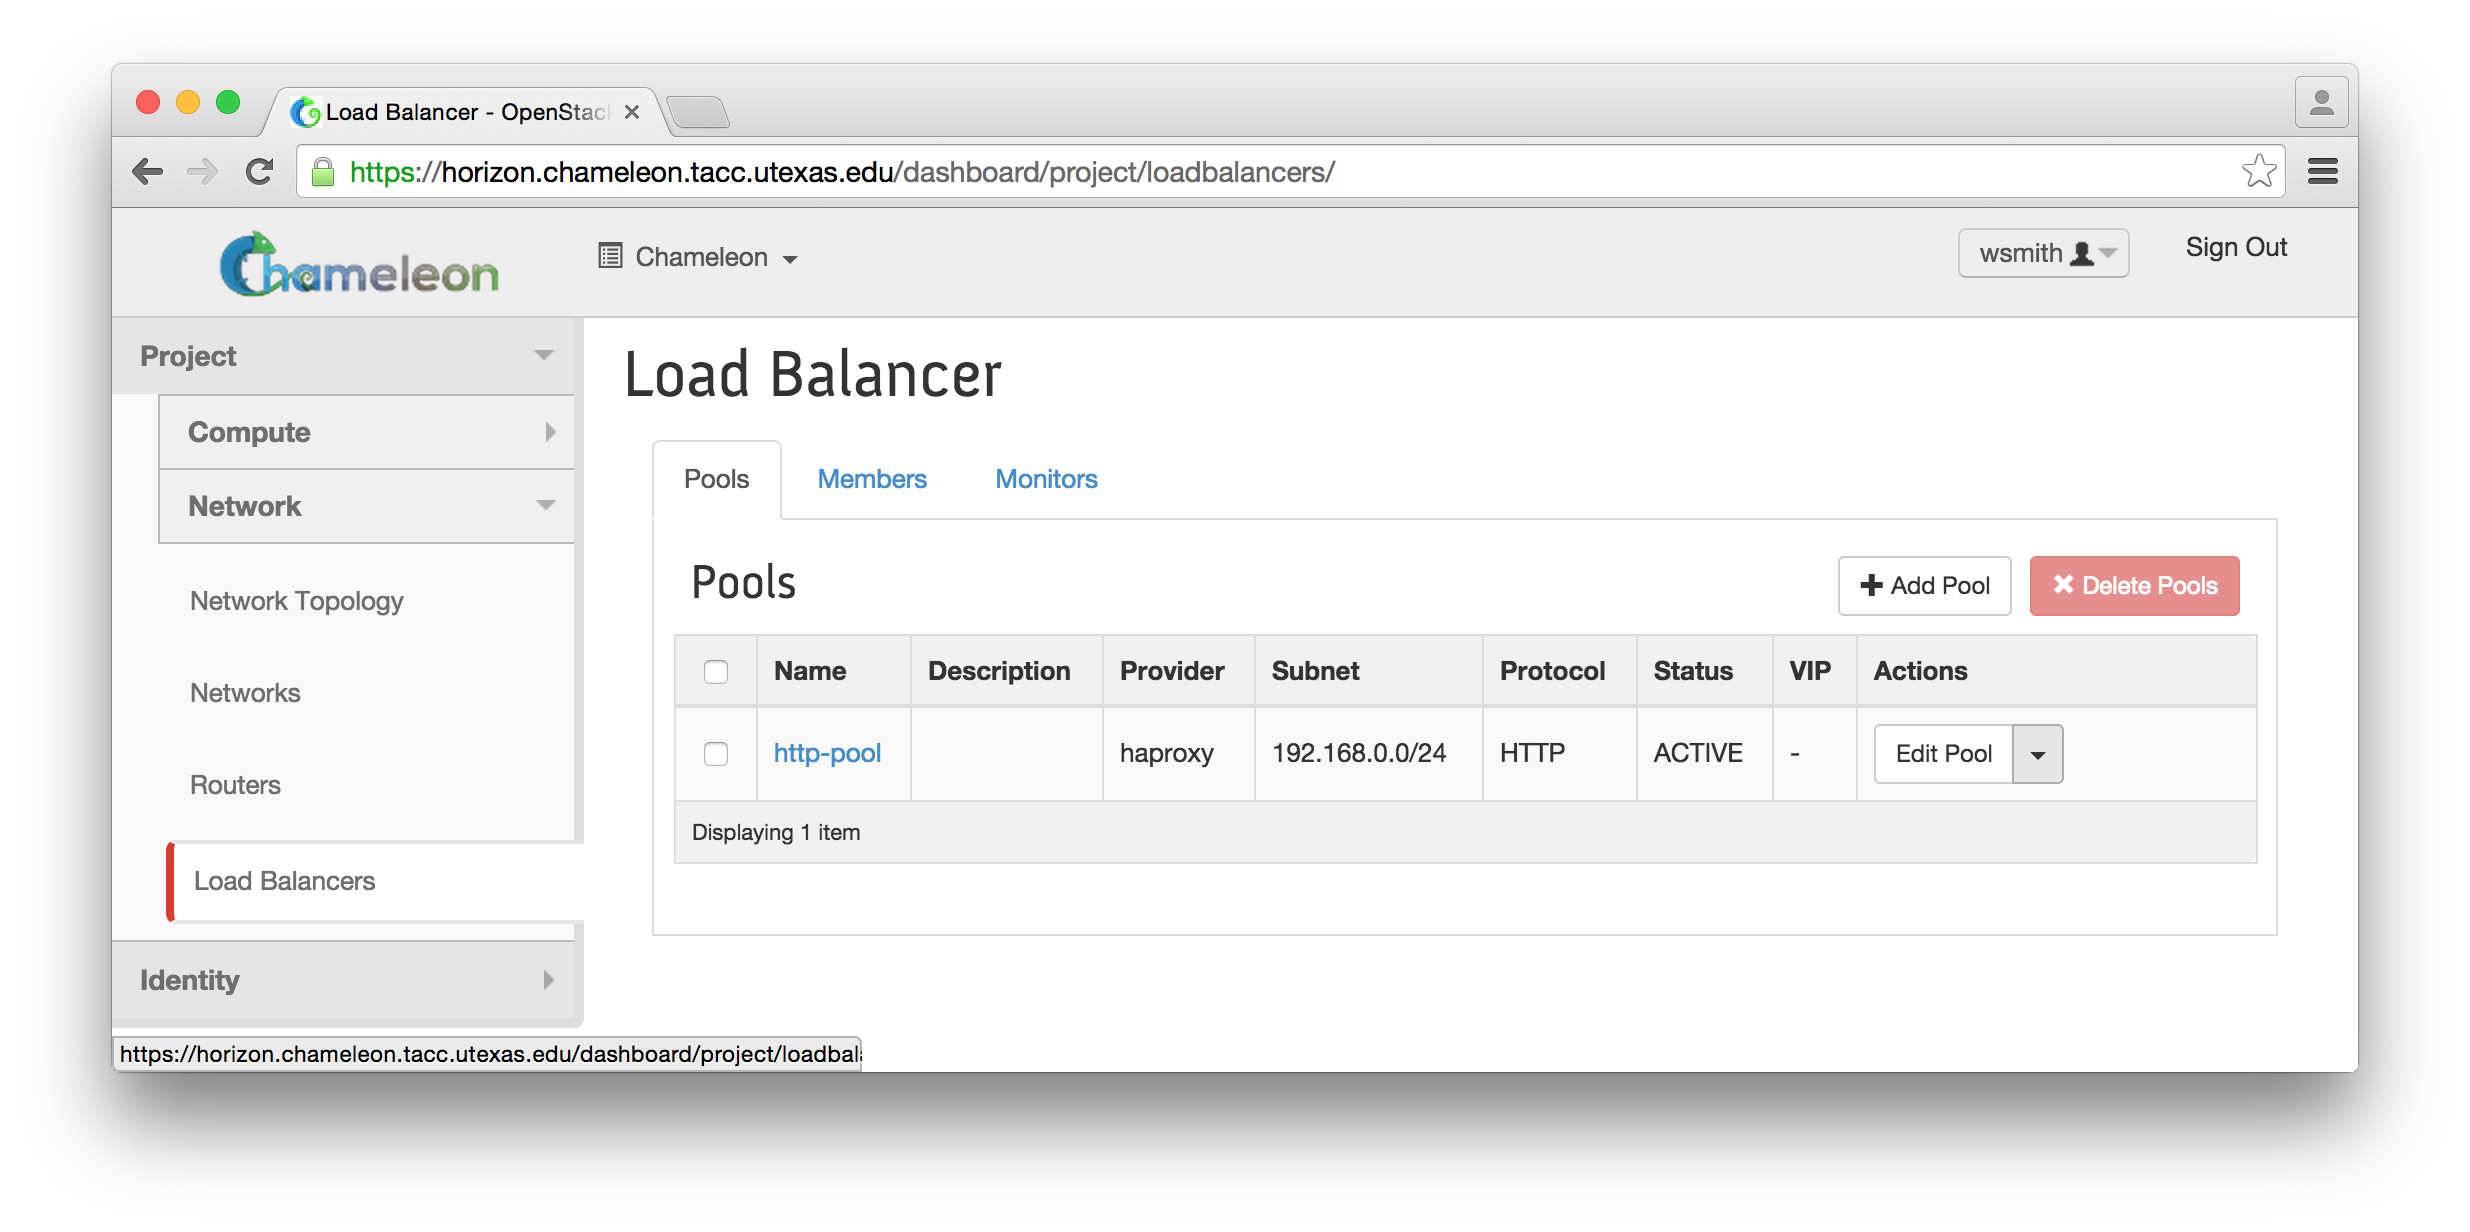
Select Add and your pool is created and the Status should be ACTIVE:
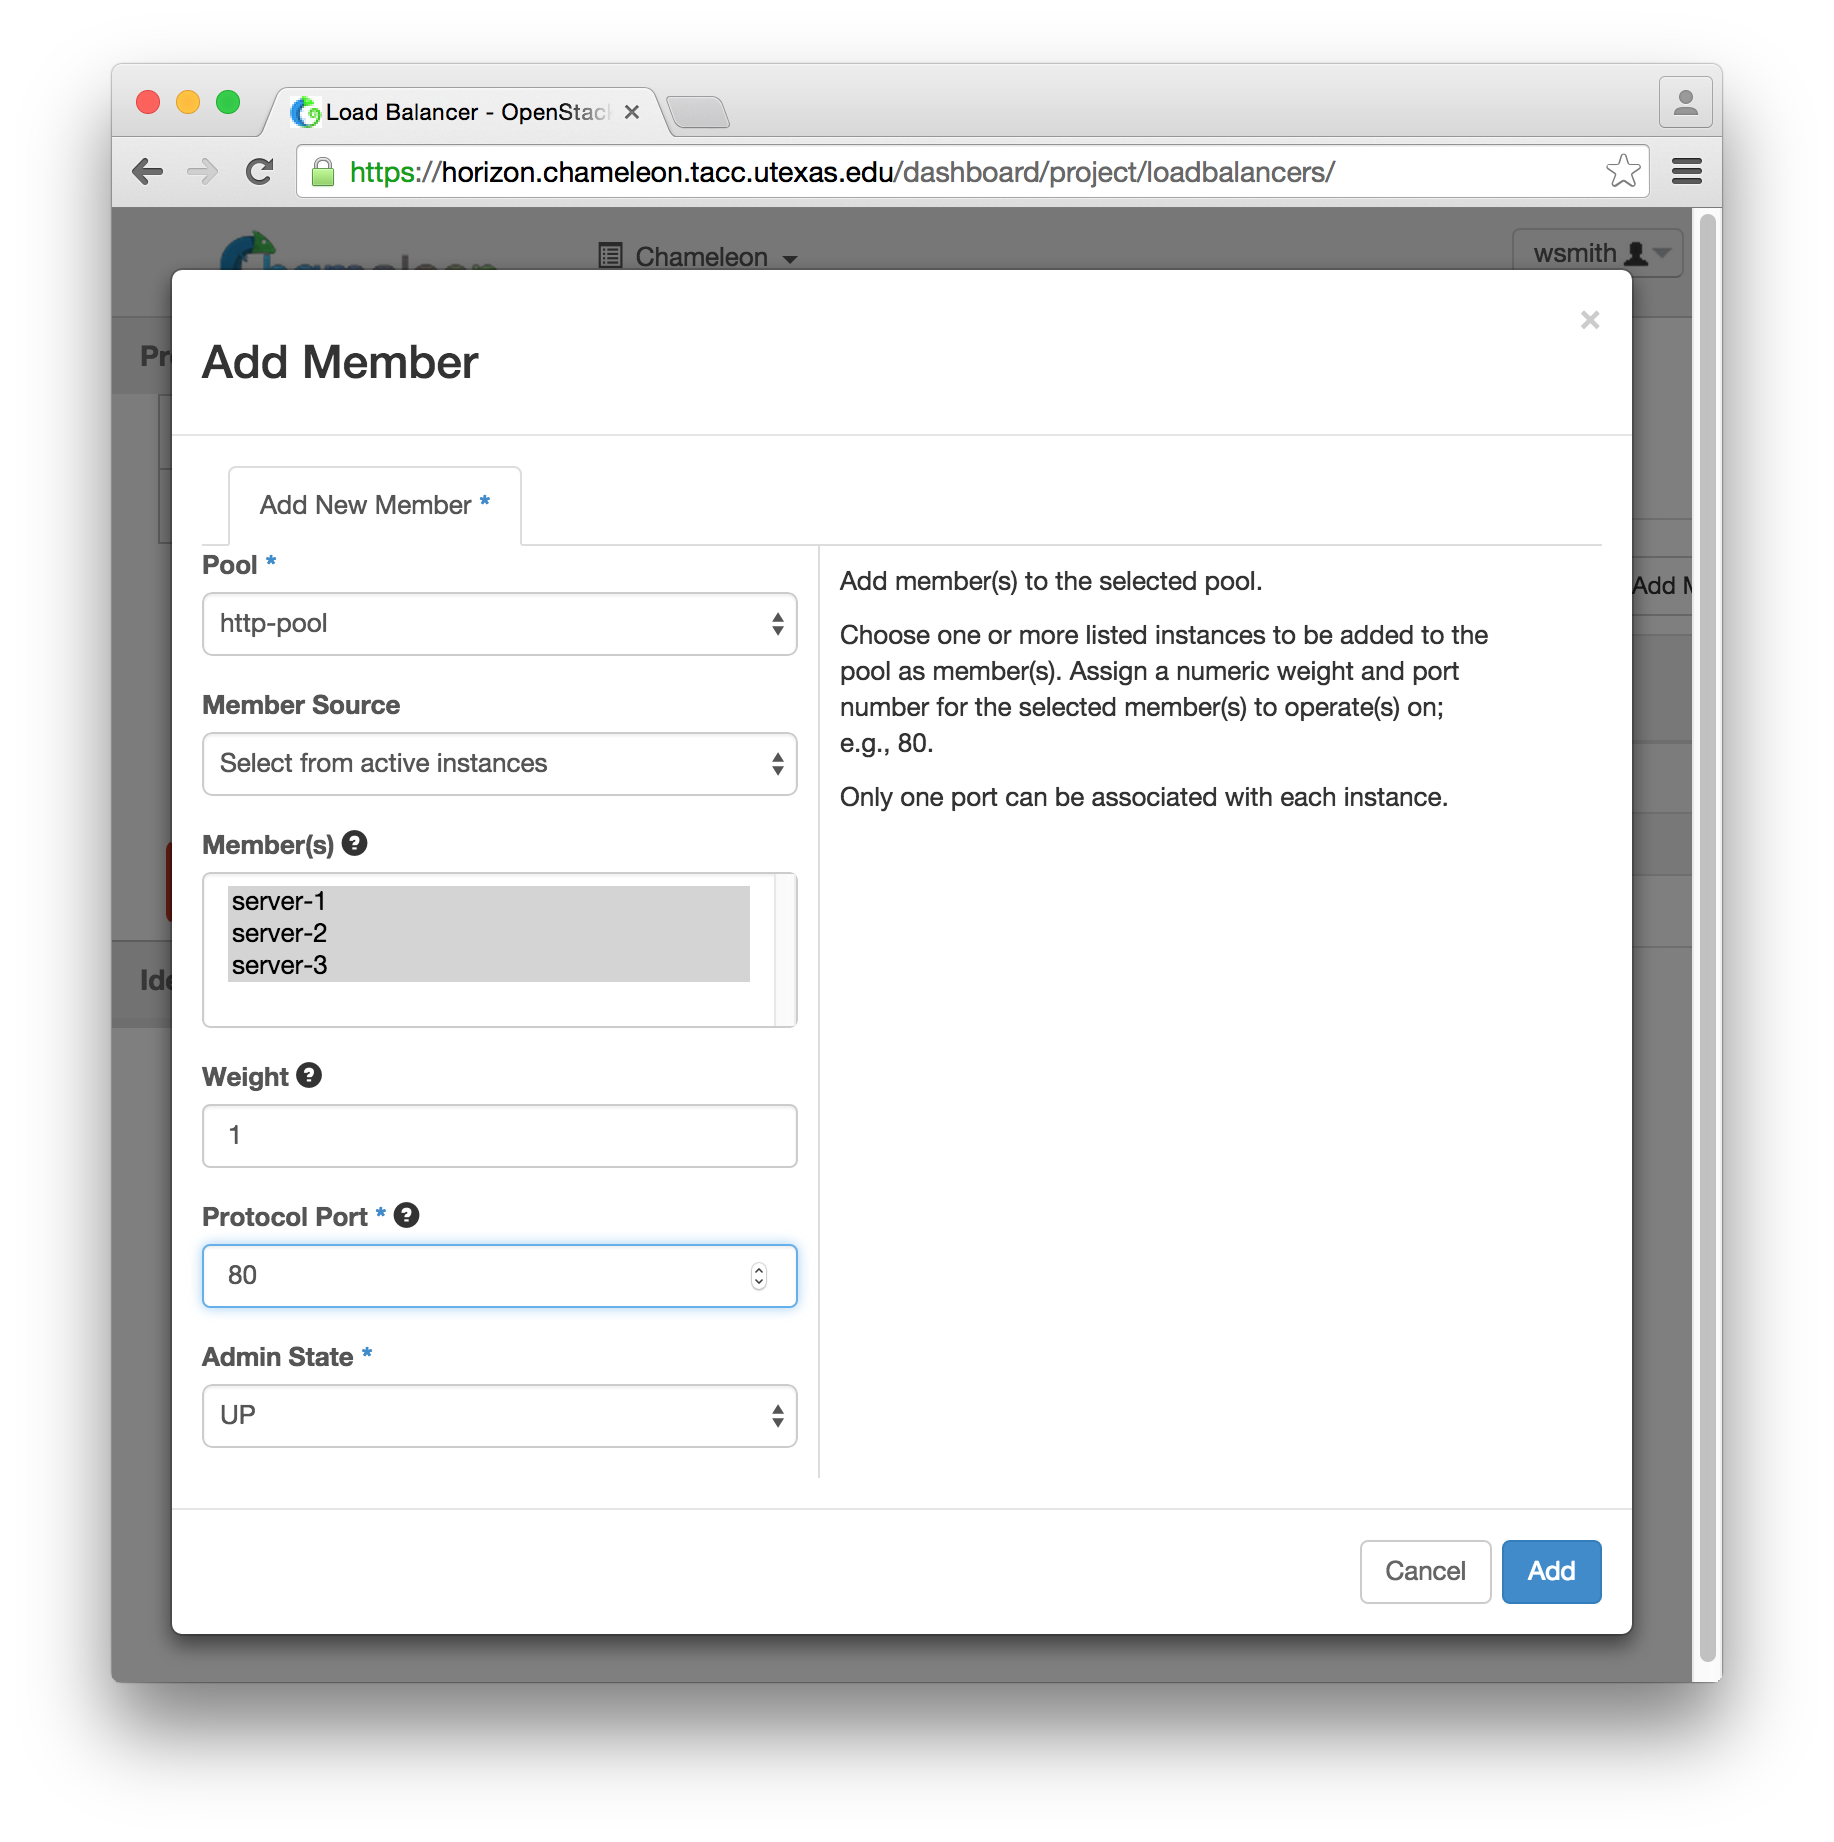
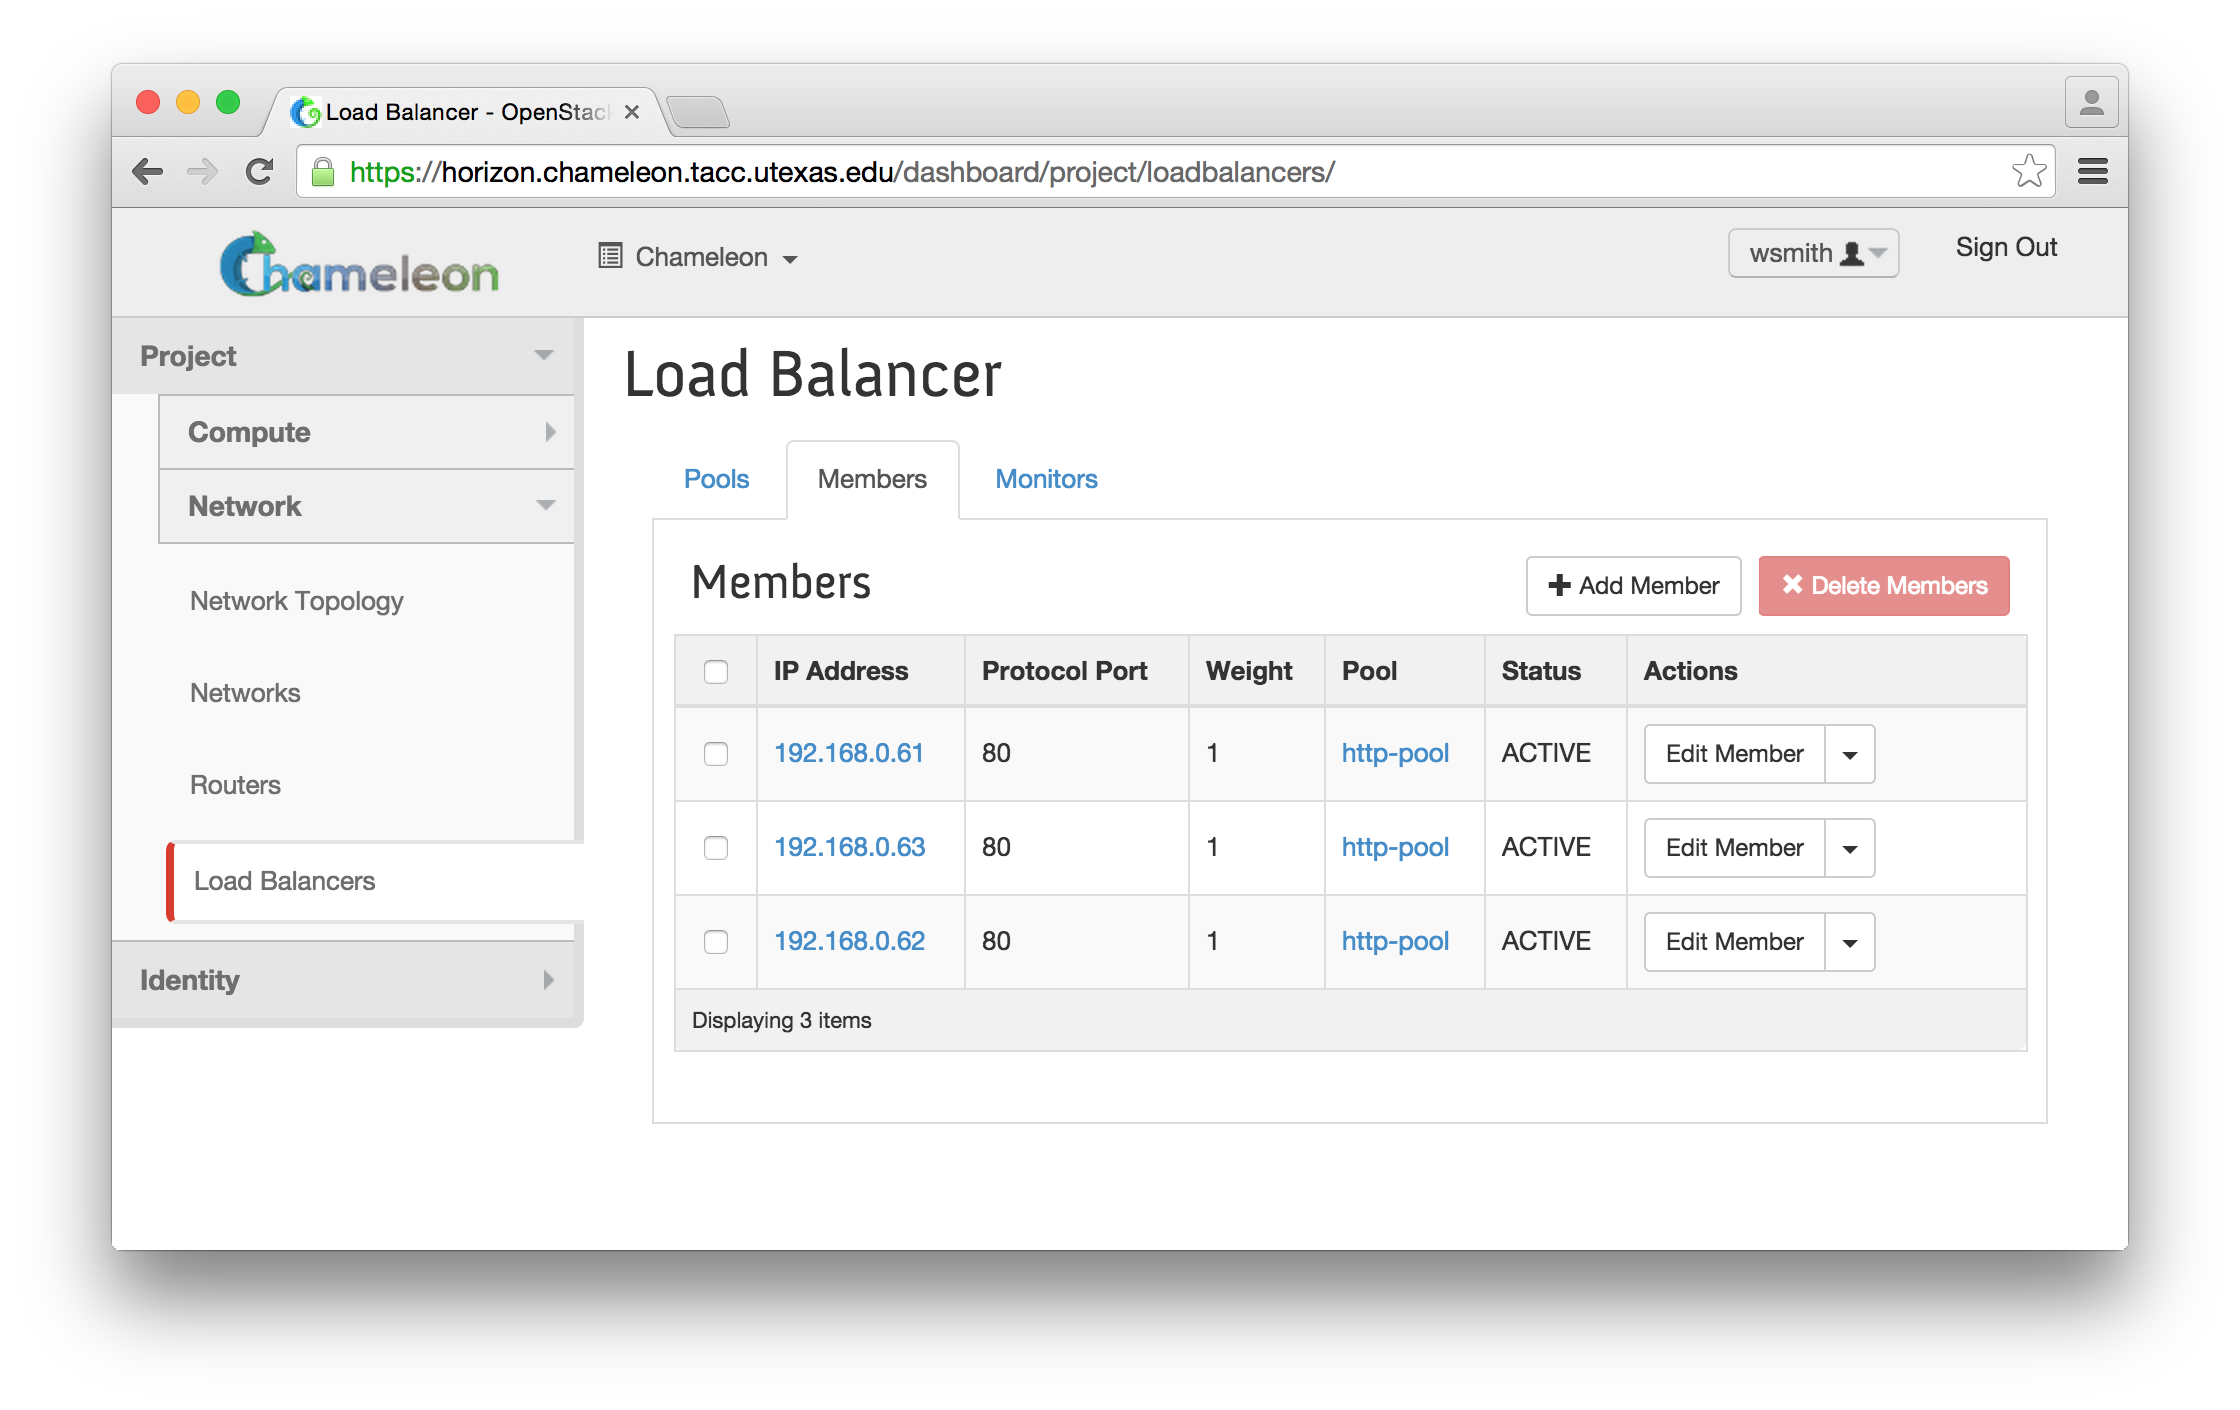
Next we’ll add the instances you created earlier to your pool. Select the “Members” tab and then “Add Member”. On the dialog, select your pool and all of the members you want to add. Give all of the selected members the same weight of 1 (you can change this later or add members one at a time with different weights) and enter 80, the HTTP port:
Click “Add” and you should see all three members of your pool with Status ACTIVE:
Now we allocate an internal Virtual IP (VIP) address for the load balancer. In the Pools tab, select the arrow to the right of your pool and then pick “Add VIP”. In the dialog, pick a name and an optional description. Then select one of your private subnets to creat the VIP on and pick an available IP address on that subnet. Finally, set a port of 80 and the HTTP protocol. For this example, you do not need session persistence, but there are several different methods available if you need them. Once you’ve entered this information:
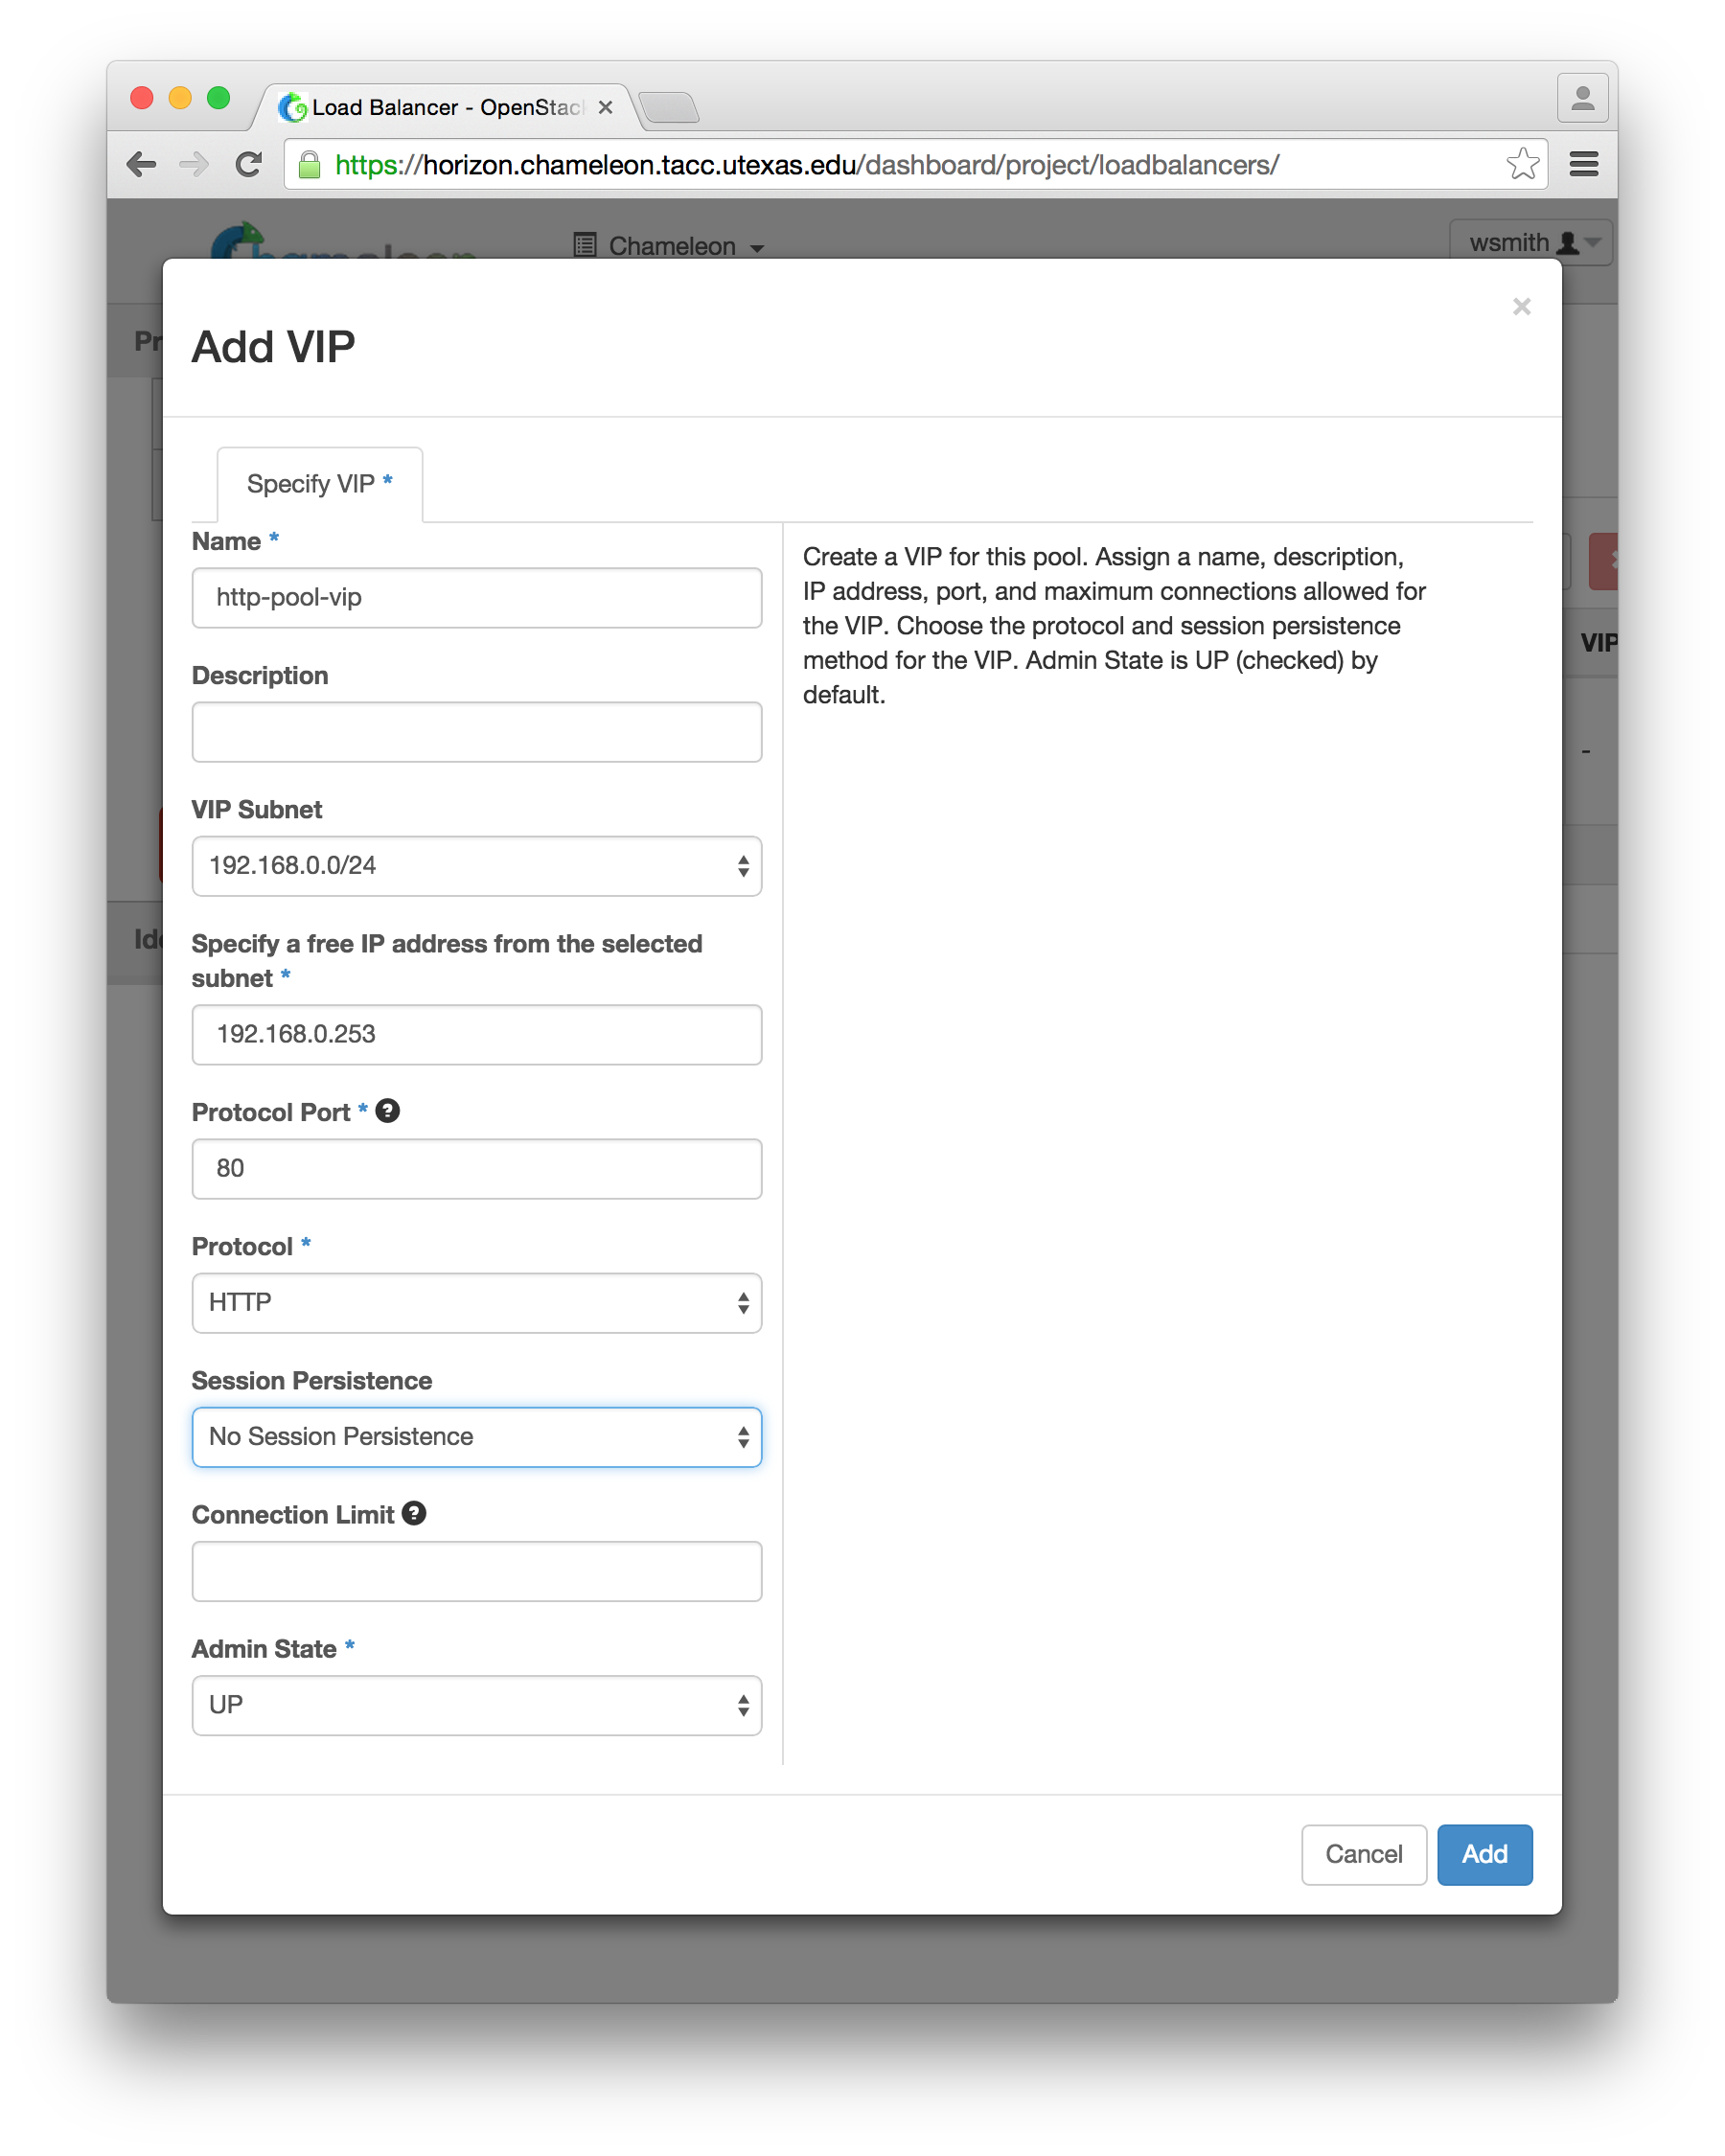
Click “Add” and your load balancer is now listening on that IP address. To access the load balancer from outside of your private subnet, you must assign a floating IP address to it. Go to the Floating IPs tab of the Access and Security page, pick an IP address and select “Associate”:
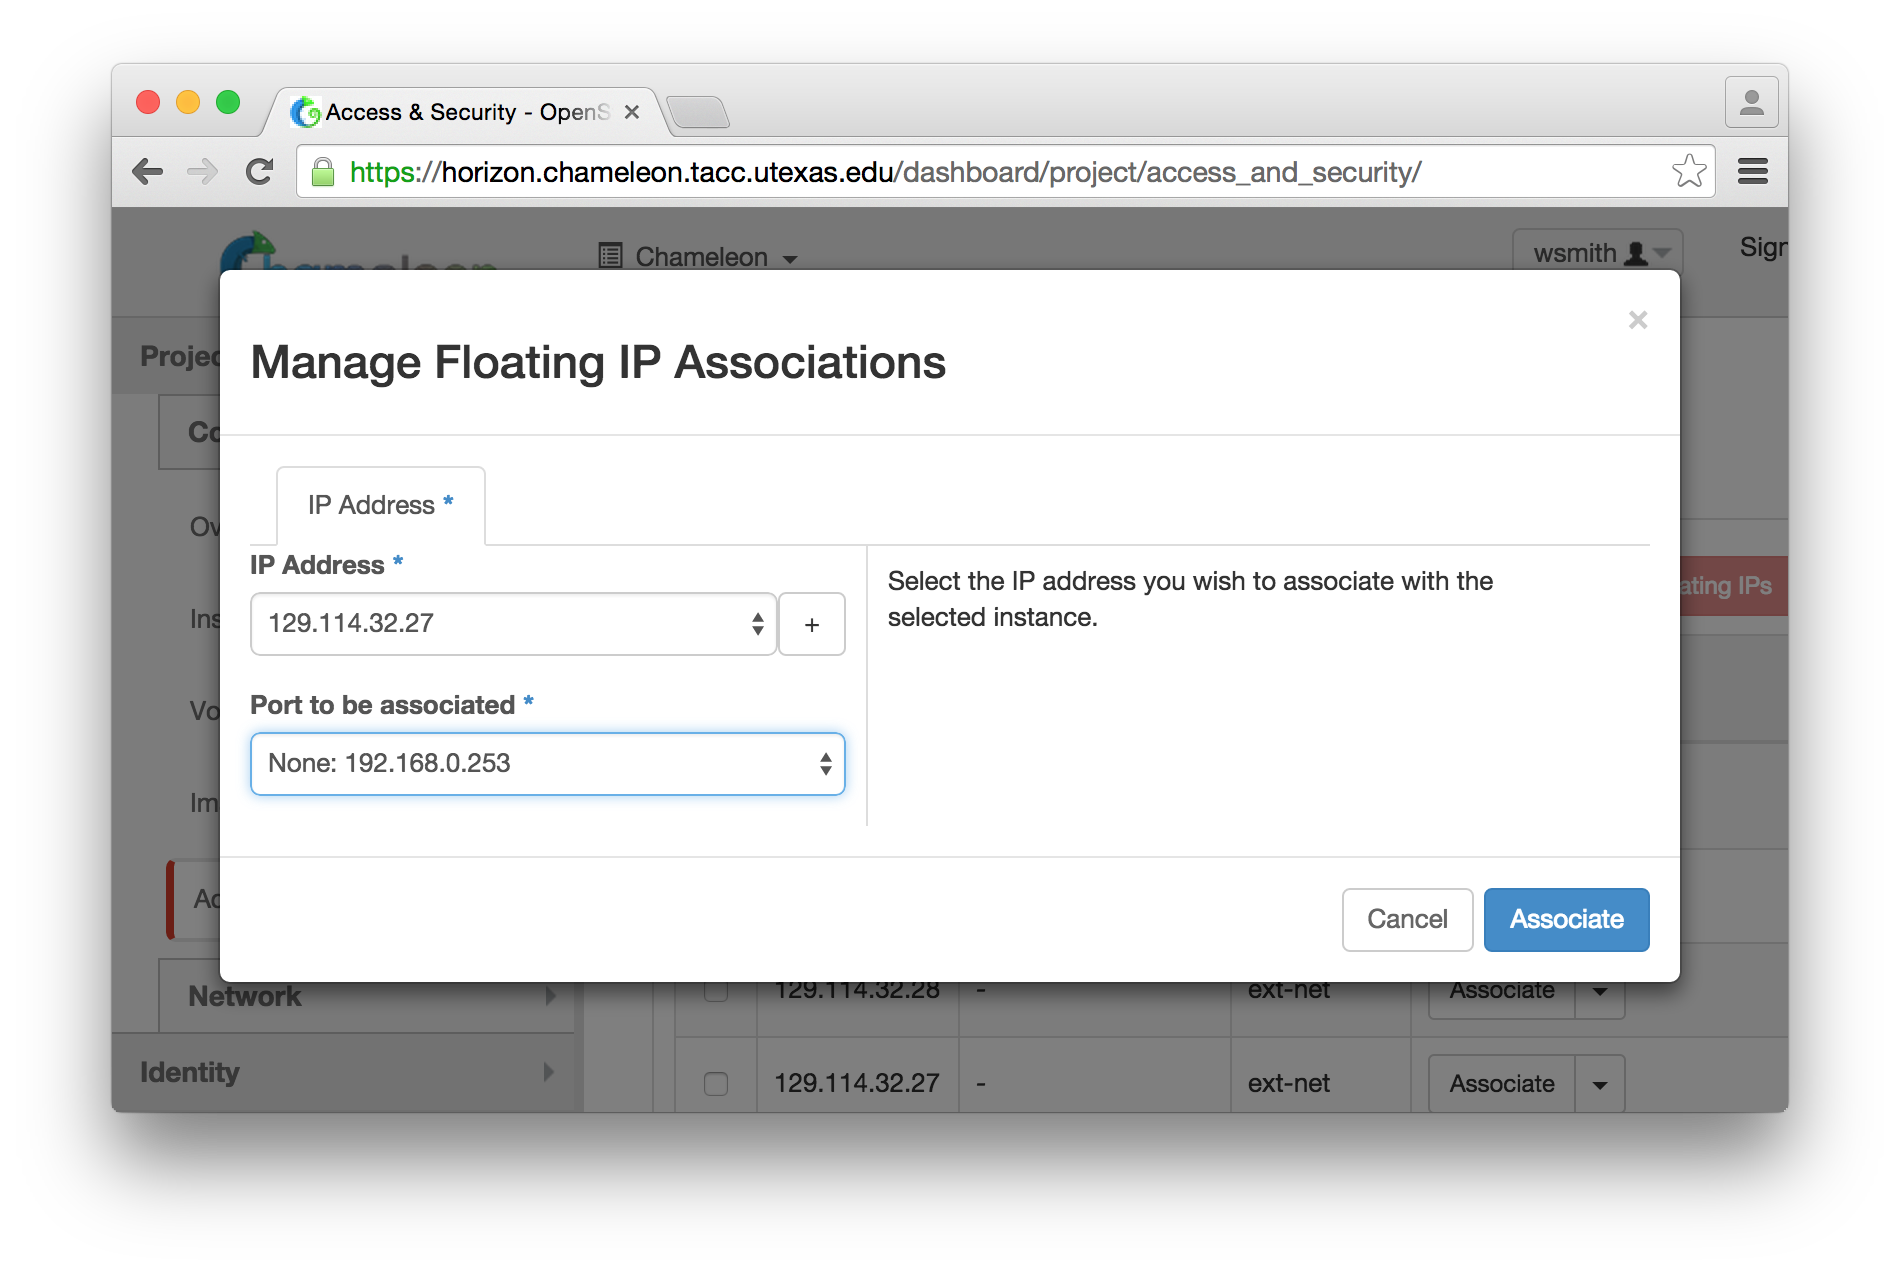
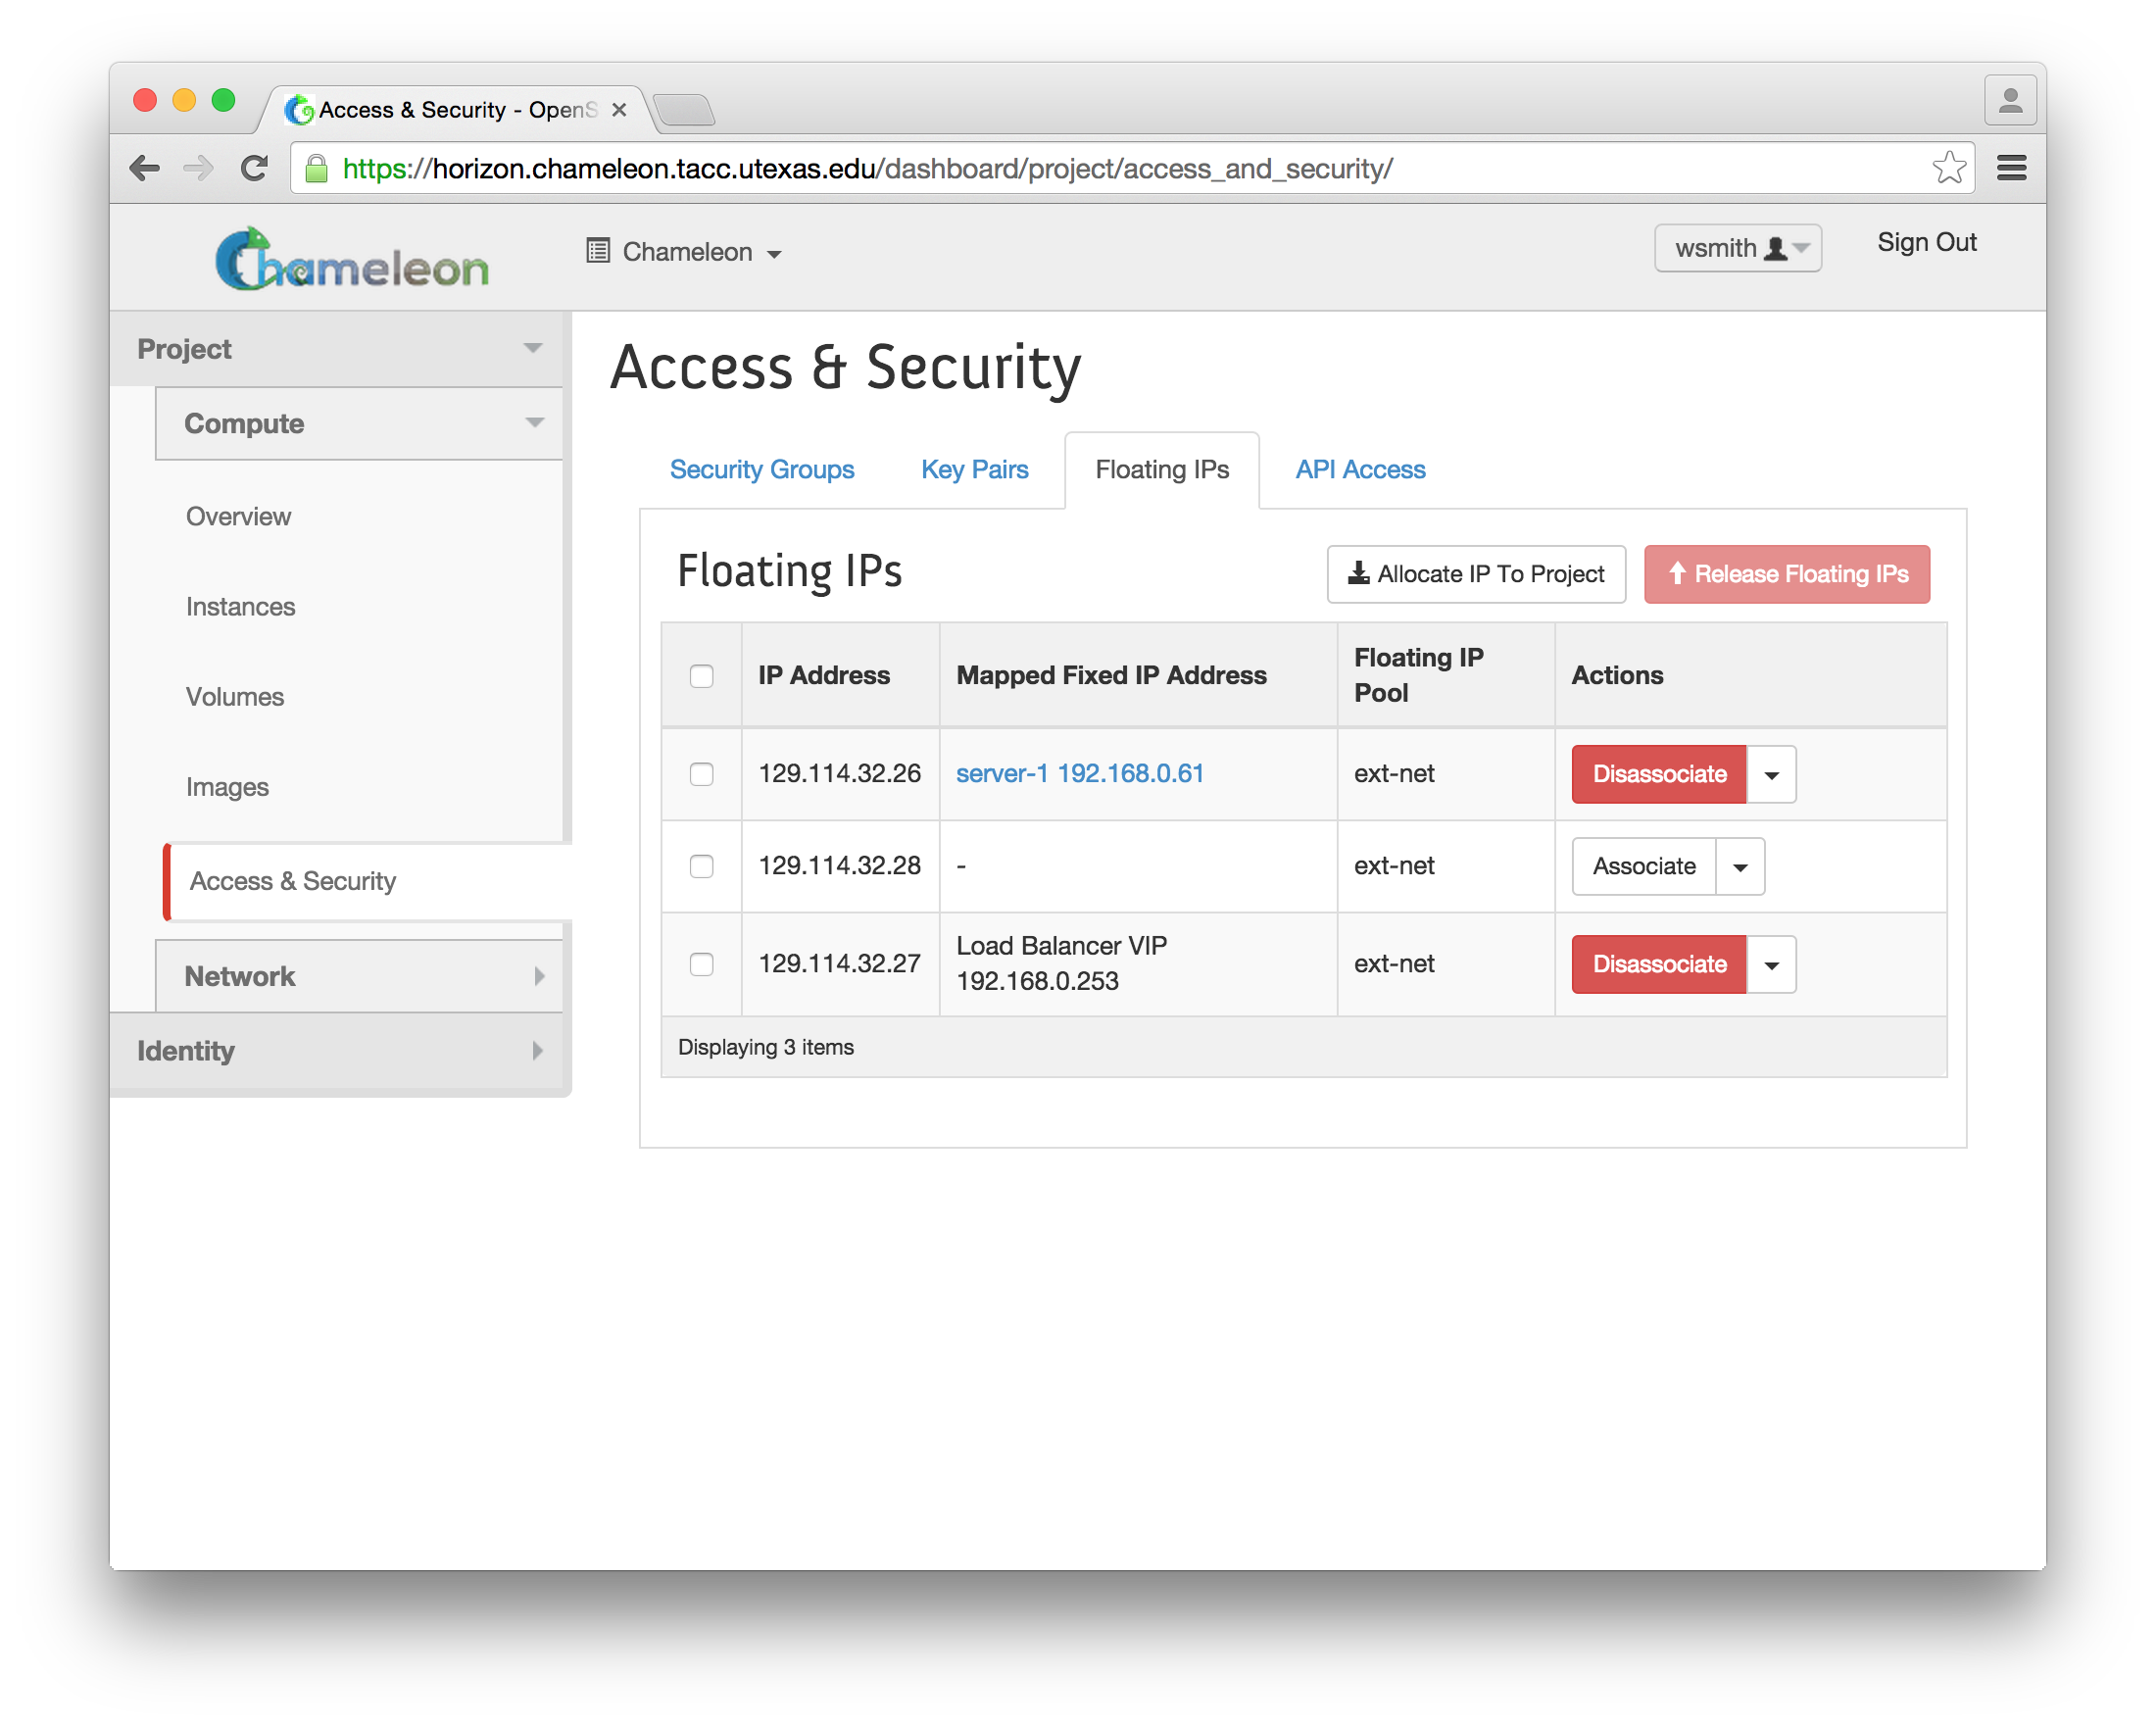
Pick the port for your VIP – it should have a name of “None” and then the VIP you selected above. Click “Associate” and you should then see that floating IP is mapped to your Load Balancer VIP:
If you navigate to that floating IP in your web browser, you should get a resonse of “server X”, were X can be 1, 2, or 3. Furthermore, if you reload that page, you should get a different “server Y”. Your load balancer is now operational.
Add a Health Monitor
An important feature of a load balancer is that it can determine if a server has failed and route traffic away from it. The OpenStack Neutron LBaaS supports this functionality by allowing you to define Monitors in the Monitor tab of the Load Balancer page. Select “Add Monitor” and then specify a monitor that you would like to add. For example, you can define a monitor that GETs a page every minute and if that fails twice, stop sending traffic to that instance:
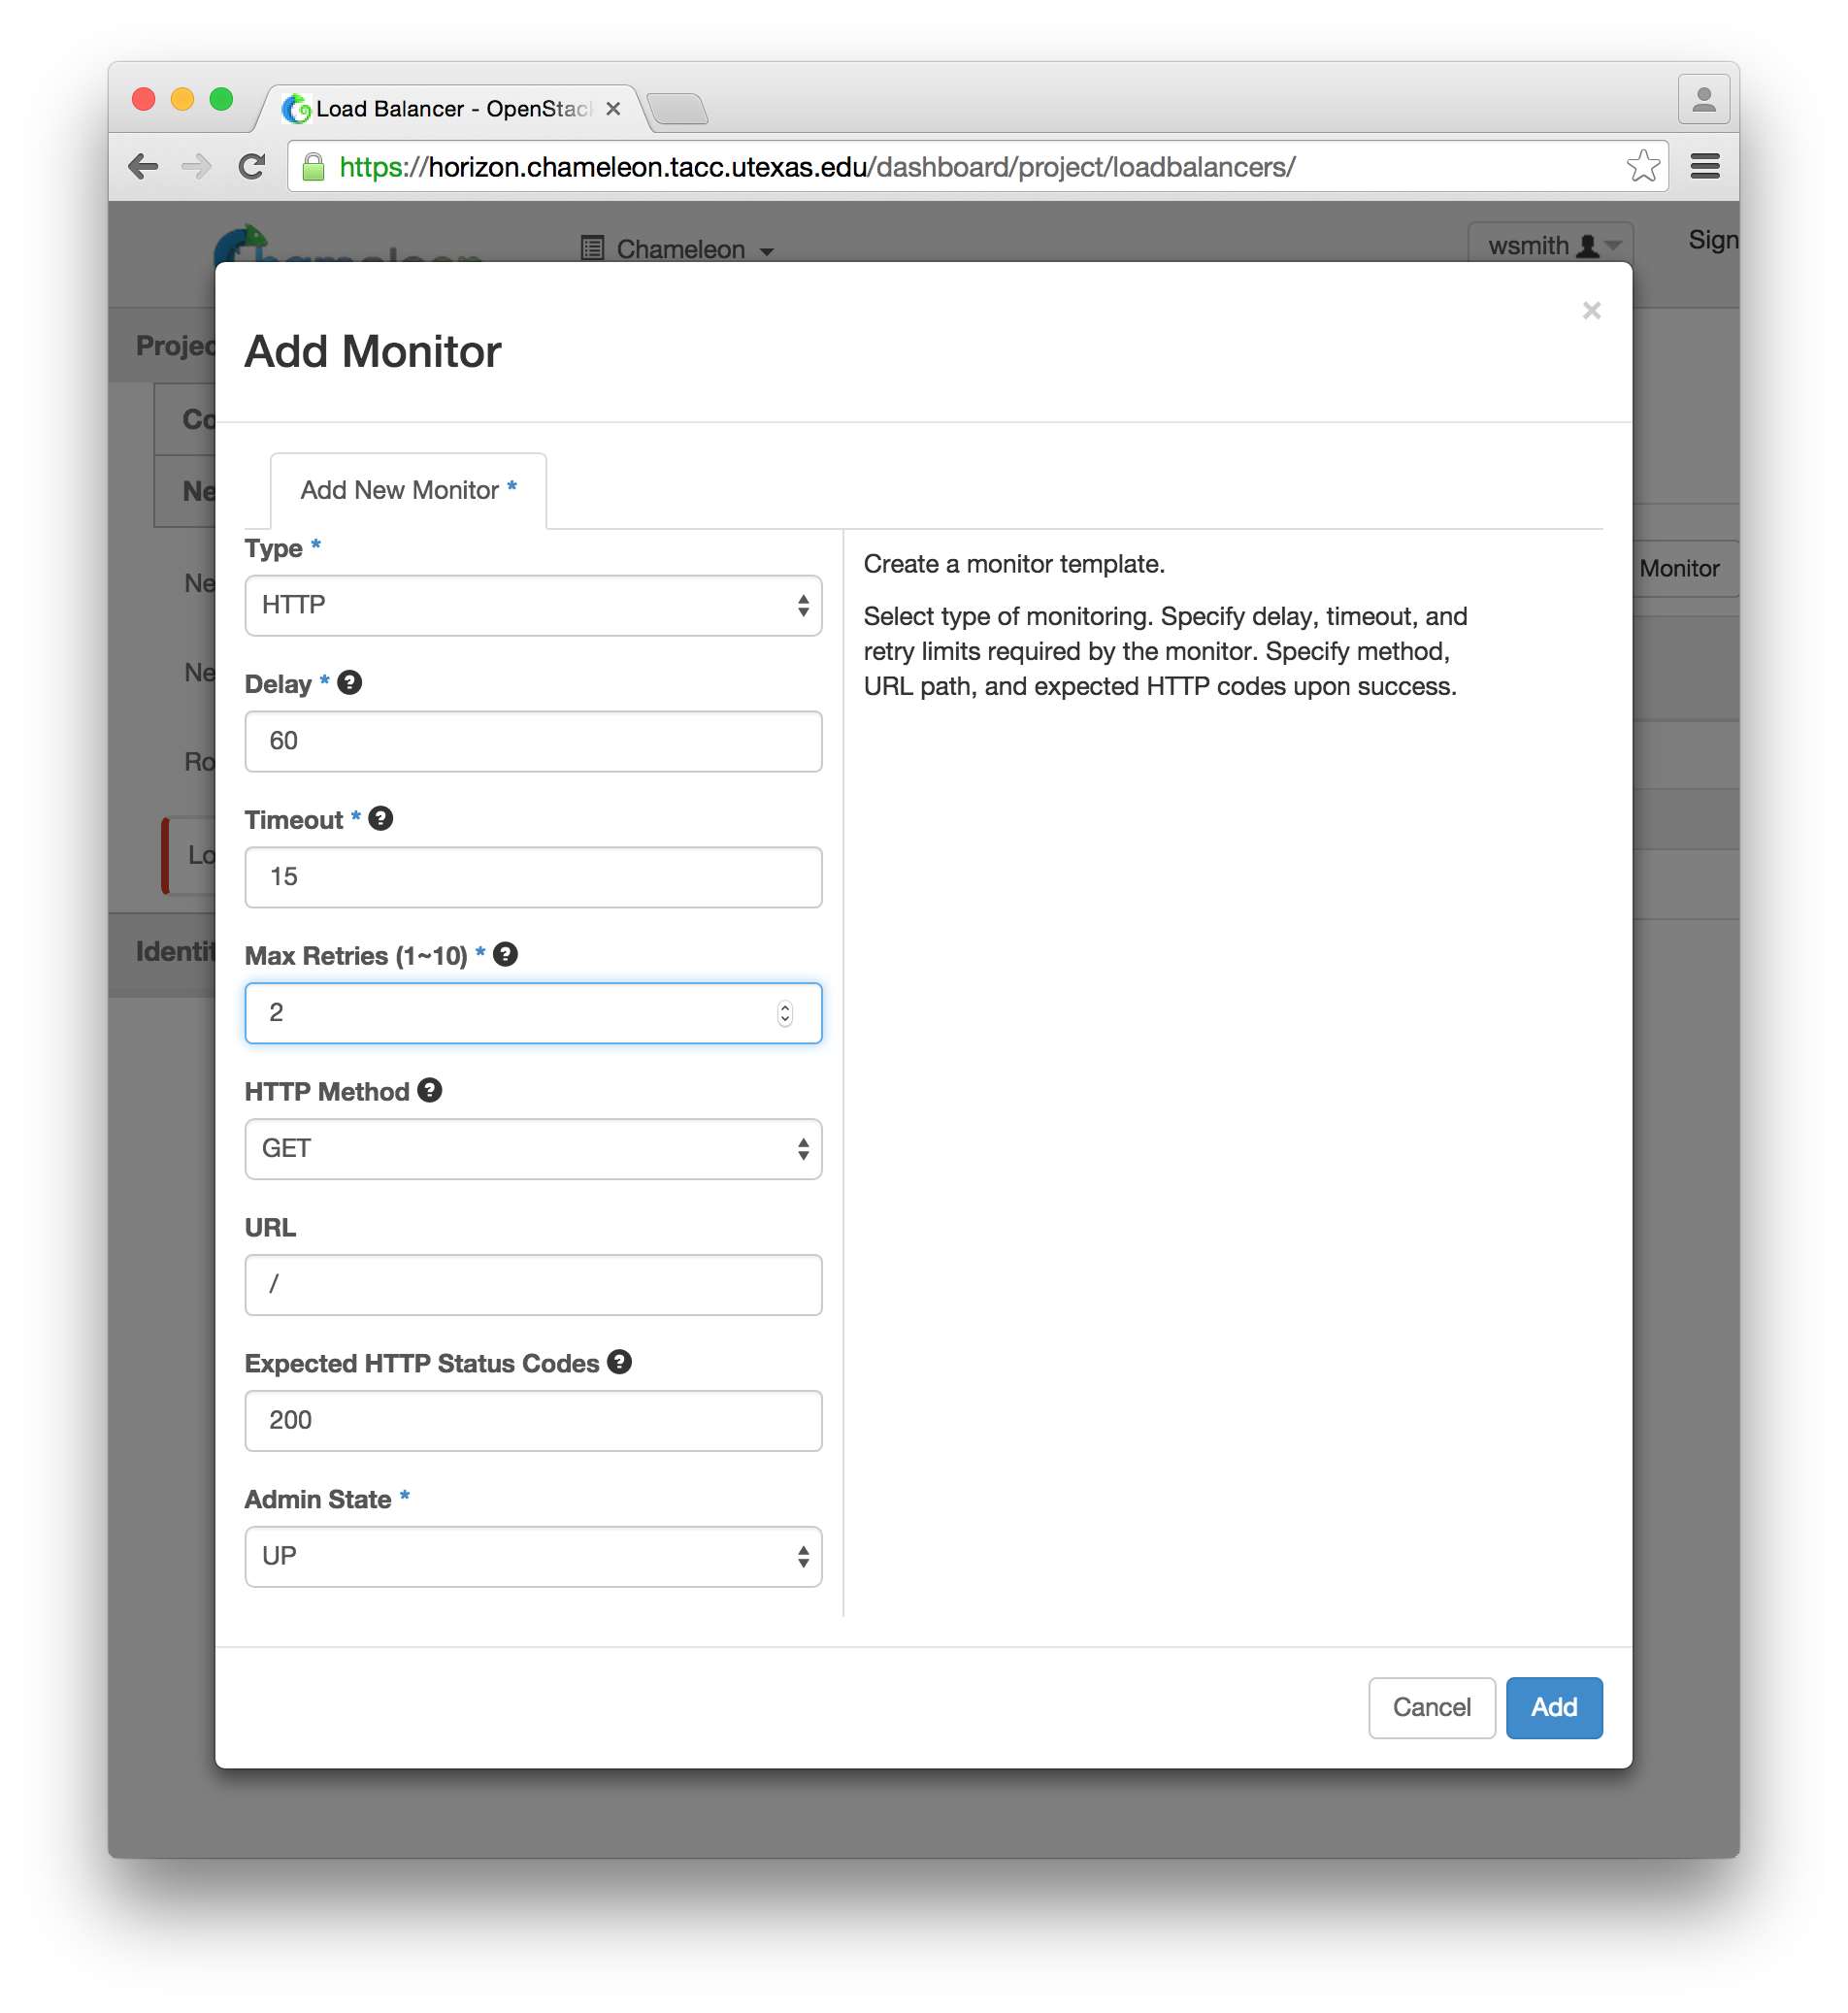
Once a monitor is defined, you associate it with your pool via the “Associate Monitor” item in the menu to the left of your pool in the Pools tab. You now have a load balancer with back end instances that are being checked to ensure that they are operating propertly.
Command Line Interface
As with all OpenStack services, you can manage load balancers from the command line if you install the needed OpenStack client packages. In addition to using the nova client program to manage instances, you use the neutron client program to manage the load balancer configuration and manage floating IP addresses.
The steps to configure a load balancer via command line programs are the same as the steps as described in the web interface above. At a high level, you will:
nova bootto create the instancesneutron lb-pool-createto create the poolneutron lb-member-createto add each instance as a memberneutron vip-createto create a Virtual IP address and associate it with your poolneutron floatingip-associateto associate a floating IP address to your Virtual IPneutron lb-healthmonitor-createto create the health monitorneutron lb-healthmonitor-associateto associate the heath monitor with your pool
No comments:
Post a Comment